With this Inkscape tutorial you will learn to draw a 3D looking snowman, but ultimately you will get a grasp of creating shadows and reflections the right way.
As Wikipedia states,
Compositing is the combining of visual elements from separate sources into single images, often to create the illusion that all those elements are parts of the same scene. Live-action shooting for compositing is variously called “blue screen”, “green screen”, “chroma key”, and other names.
Today, most though not all compositing is achieved through digital image manipulation. Pre-digital compositing techniques, however, go back as far as the trick films of Georges Melies in the late 19th century; and some are still in use.
In other words, compositing is a way of merging and filtering moving pictures.
Compositing applications can be roughly classified as:
- Layer-based. Composition is a set of overlayed images and filters. This is used for simple effects and video graphics and mostly used on TV and commercials.
- Node-based. Composition is created from image sources, filters and other procedures as graphs/nodes that are interconnected. Provide much more freedom and are used for feature films to create huge compositions with lots of elements.
There is a number or rather good and not so good commercial/proprietary solutions for compositing, off-top of my head:
- Apple Shake;
- The Foundry Nuke;
- Autodesk Combustion;
- Eyeon Fusion;
- Adobe After Effects.
Free open source sofwtare users don’t have much choice. Until very recently existing solutions were:
- Blender: its built-in composer looks quite good until you start using it seriously, which is where you discover that it’s quite slow, that you need to create Viewer nodes all the time, that animation tools lack simple functionality (like Time and Translate nodes not being able to shift an image by half a pixel). Besides it crops an image that goes outside visible area. I don’t even mention rotoscoping (vector masks) and other pitfalls.
- Synfig Studio: even though this application is designed with feature film quality 2D animation graphics in mind, some compositing tasks can be accomplished easily. And since it’s really all about vector animation, rotoscoping is no problem at all. Besides Synfig’s rendering engine handle large resolutions quite well (remember the feature film bit, eh?). The main disadvantages are a small set of effects and no being able to work on extra channels like depth, speed and other cunning things. Synfig organizes elements into a tree, so you can use it as a kind of substitute to Adobe After Effects.
- Cinelerra: works on layers, has more or less functional rotoscoping and nice filters. Still, I’d rather not do any production level compositing with Cinelerra.
- GAP: GIMP Animation Package can do it too, but in a destructive manner, since any source image is physically changed after application of a filter.
And then Ramen came out of blue.
The How and The Why
Our savior’s name is Esteban Tovagliari who’s been working in CG and commercials as composer professionally for over 10 years. Having started programming at the age of 15 (and loving it), he later created a number of image processing tools to accomplish his daily tasks at work. However all of them had command-line user interface which wasn’t really efficient, because one had to export, process, import back, check, start all over again and so on. This is why Ramen was started.
About a year ago Esteban gave a couple of copies of the application to his friends and work mates and then figured out that by opening source code he could make a contribution to open source world in general. Especially since Apple was planning to ditch Shake and Adobe and Autodesk were sort of going astray. And thus Ramen was reborn as an open source project at SourceForge.
Installation
I’m saying this with a straight face: there are no builds for Windows. Yet. Some first steps towards it have already been done, but what with one thing and another Esteban never really found time to install a third operation system and support a build for it. What you can download from the project’s page are Linux and Mac builds. Right about the time we published this article, new builds were uploaded, so you, our lucky firsts readers, can still beat the rush for the latest and greatest.
However if you feel like watching evolution of the project from the first row, you can use SVN. And that’s where things go interesting, because Ramen heavily relies on third-party libraries, so it’s all about dependencies again. Which is quite excusable when you think about how many people (just one) are currently involved in the project as developers.
So the magic command to fetch copy of SVN repository is:
svn checkout https://ramenhdr.svn.sourceforge.net/svnroot/ramenhdr/trunk ramenhdr
You need to check the list of libraries required to build Ramen, which you can find in INSTALL.txt. At the moment of publishing the article the file wasn’t mentioning that you need boost 1.42 to build Ramen with GCC 4.4 compiler (that’s because earlier versions of boost’s GIL library and this particular version of GCC get along like a house on fire).
If you are Ubuntu user, you are even more lucky, because yo can use nightly builds from Eibriel’s PPA.
You will also need a rather modern videoadapter that is also not of Intel persuasion (you really want float textures supported). On my GeForce 8200 Ramen runs just fine.
Basics
If you never used a compositing application before, you might like to know basics of creating a node-based composition, before you face Ramen. And those are:
- You start with creating one or multiple image sources, such as Color, Color Bars, Gradient, Image nodes (supports TIFF, SGI, TGA, PNG, JPEG, HDR, EXR, DPX and CIN), Mandelbrot (fractal) node, Noise node (useful for dithering) or Quick Shape node (vector mask for rotoscoping).
- Then you add a number of filtering and mixing nodes.
- After that you create a desired amount of output Image nodes (same file formats supported as for input Image node).
- Finally you connect inputs and outputs with wires.
Got it? And now let’s have a look at Ramen:

Most of the screen estate is used for composition preview. Below are two windows grouped into tabs: a composition tree view (active by default) and animation curves editor. The right sidebar contains editor of selected node’s settings.
Nodes are created from Create menu and connected by dragging a pointer from input/output of one node to input/output of another node. To remove connection wire just click it while pressing Ctrl key. Output is always marked with a yellow square, back/front inputs are green and red correspondingly, and matte is blue:
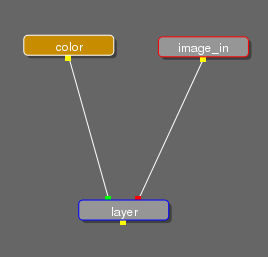
An active node, whose settings are in settings editor, has a red frame around it. A node currently displayed in preview area has a blue frame. Selected nodes also have a yellow background.
To activate a node double-click it.
By default preview area displays the currently active node, so if you want to edit one node and preview another (e.g. to see how changes in one node affect the whole composition), switch mode from Active to Context in the preview area.
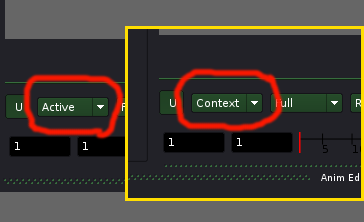
After activation of Context mode double-click the node of interest with Ctrl key pressed and you’ll get preview from that node.
You will also like to use at least these basic shortcuts:
- , and . — zoom in and out; area of magnification is where you last clicked.
- Backspace — remove selected nodes on the animation curve
- Alt + Left Mouse Button — panning
- Alt + Shift + Left Mouse button — Zoom view
For the rest of the shortcuts please investigate main menu.
A simple example of using Ramen
Idea
OK, now that you know, where is what, let’s do a simple composition: a brutal Linux console, which is filled with ink spots and fades to linuxgraphics.ru logo (which is the website the article is originally written for). Here is the final video to make:
Source materials
Video of Linux loading was recorded with VirtualBox and xvidcap. This video features a compact and nice SliTaz distro.
Ink spots were created using Indian ink, pipette, paper, scanner and GIMP. The logo, of course, was borrowed from linuxgraphics.ru.
Bootload screencast
Before starting anything I actually rearranged UI by dragging dockers around and started creating the composition:
Ramen cannot show where borders of a frame currently are yet, so I’m using a well-known old trick: a bright background of a required size created with Color node. So now I can see how exactly to stretch the image.
Ink blobs
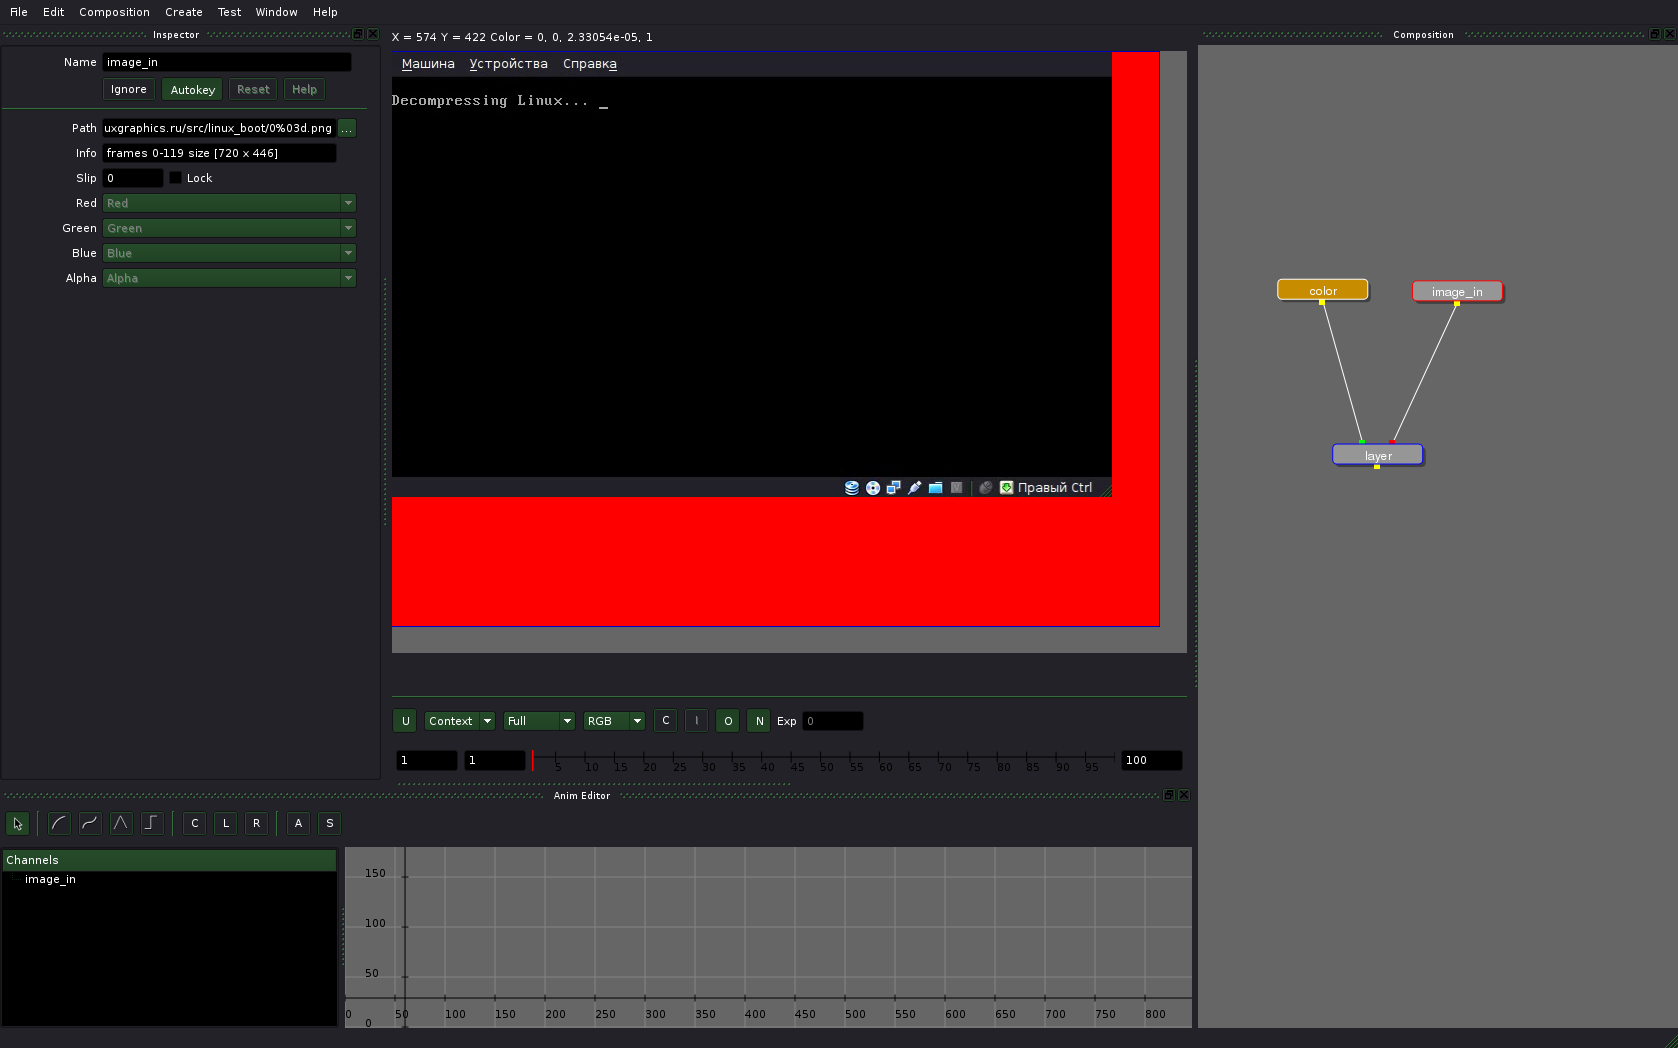
Let’s add the ink blobs I already scanned. Ramen determines them as a sequence of frames, which is not exactly what we want. Luckily there is a very useful Slip field and a Lock checkbox among image_in’s settings which allow defining a particular frame of the sequence and switch off change of frames.
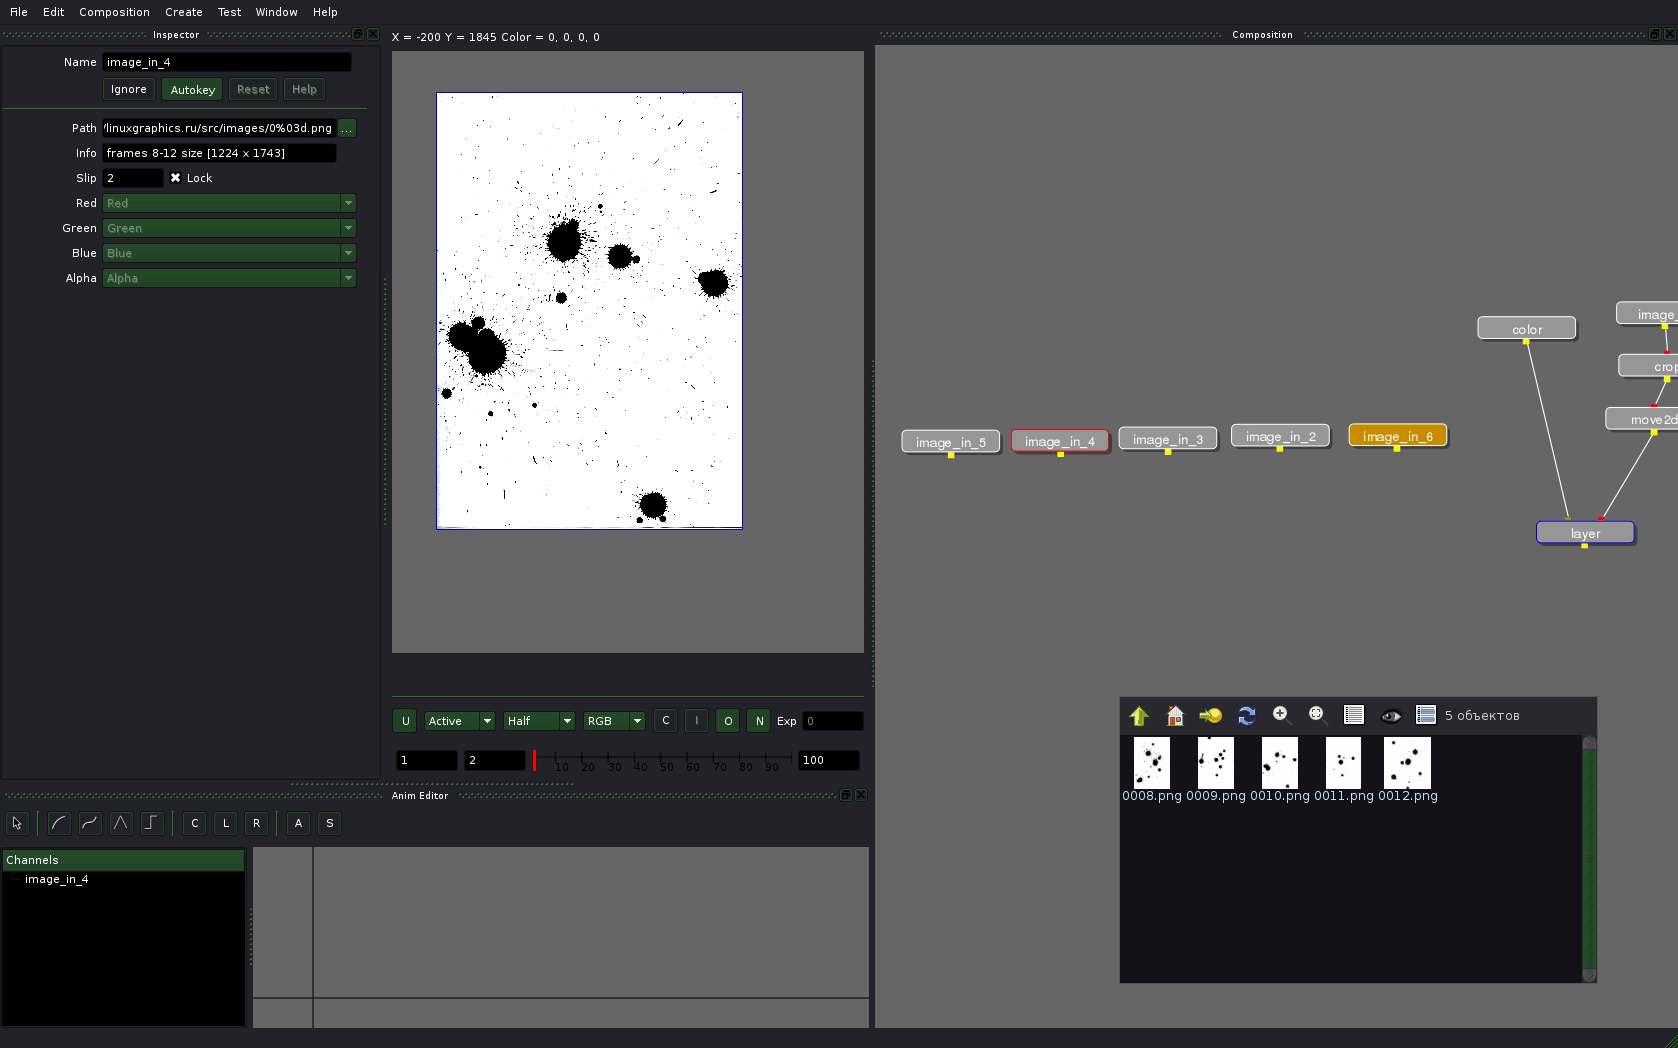
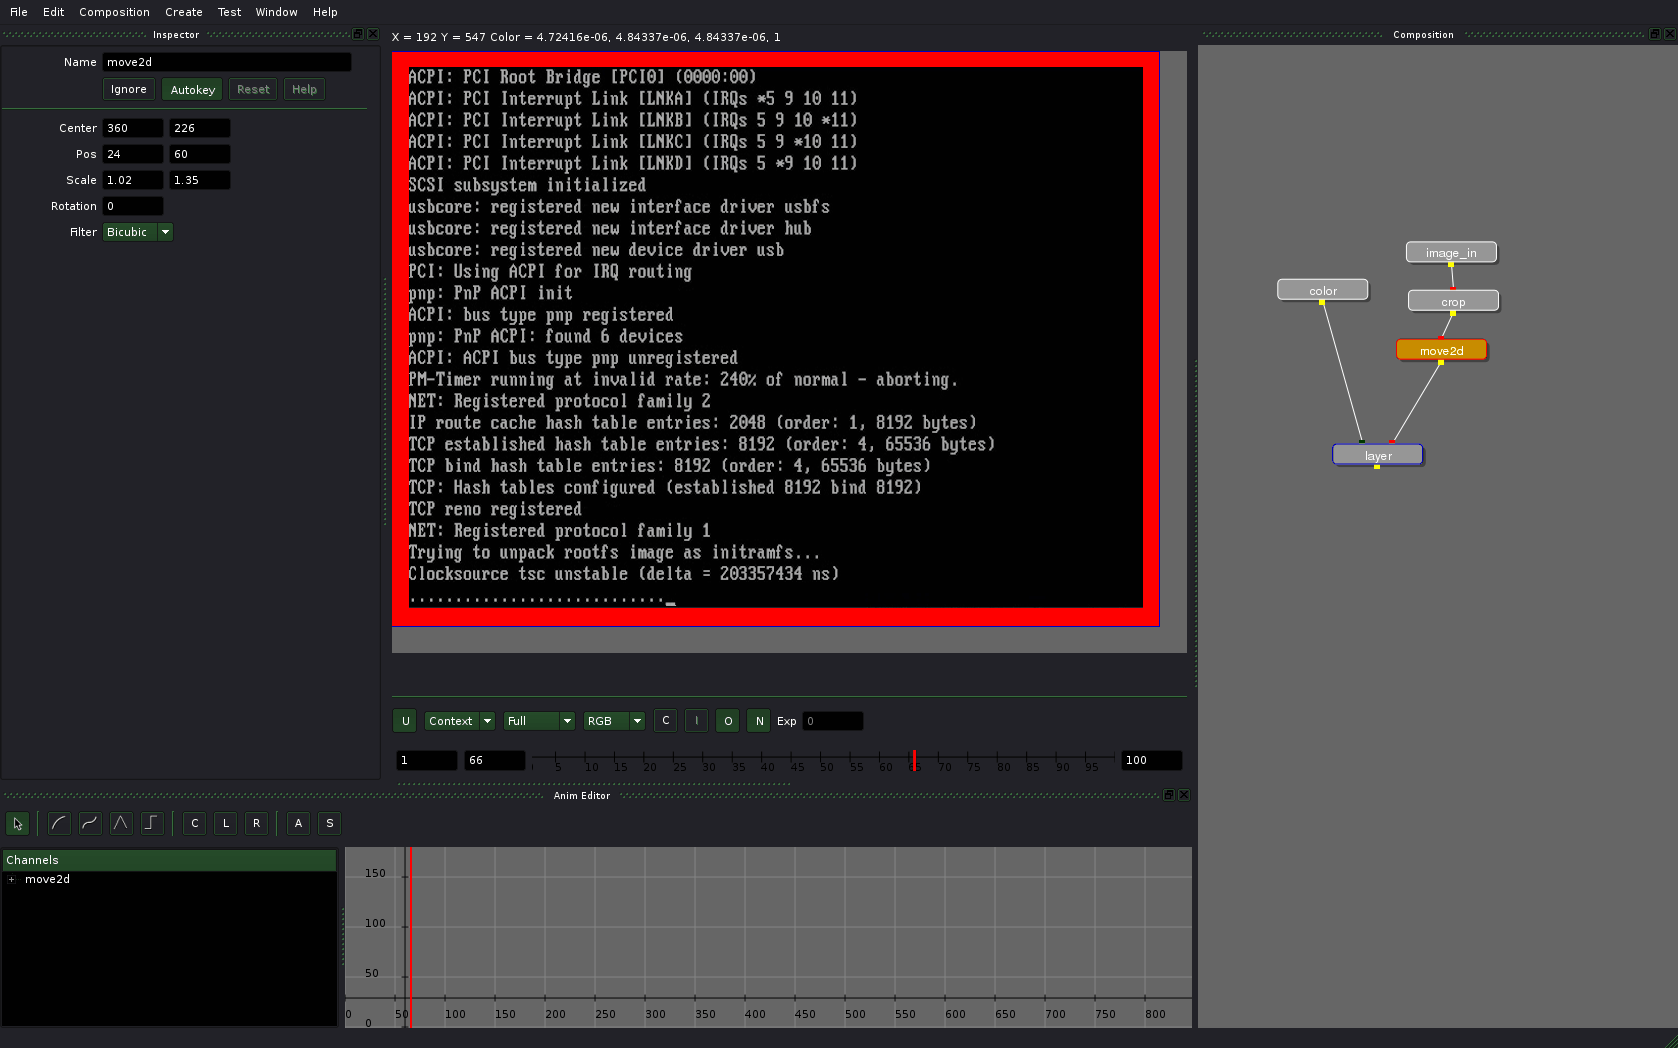
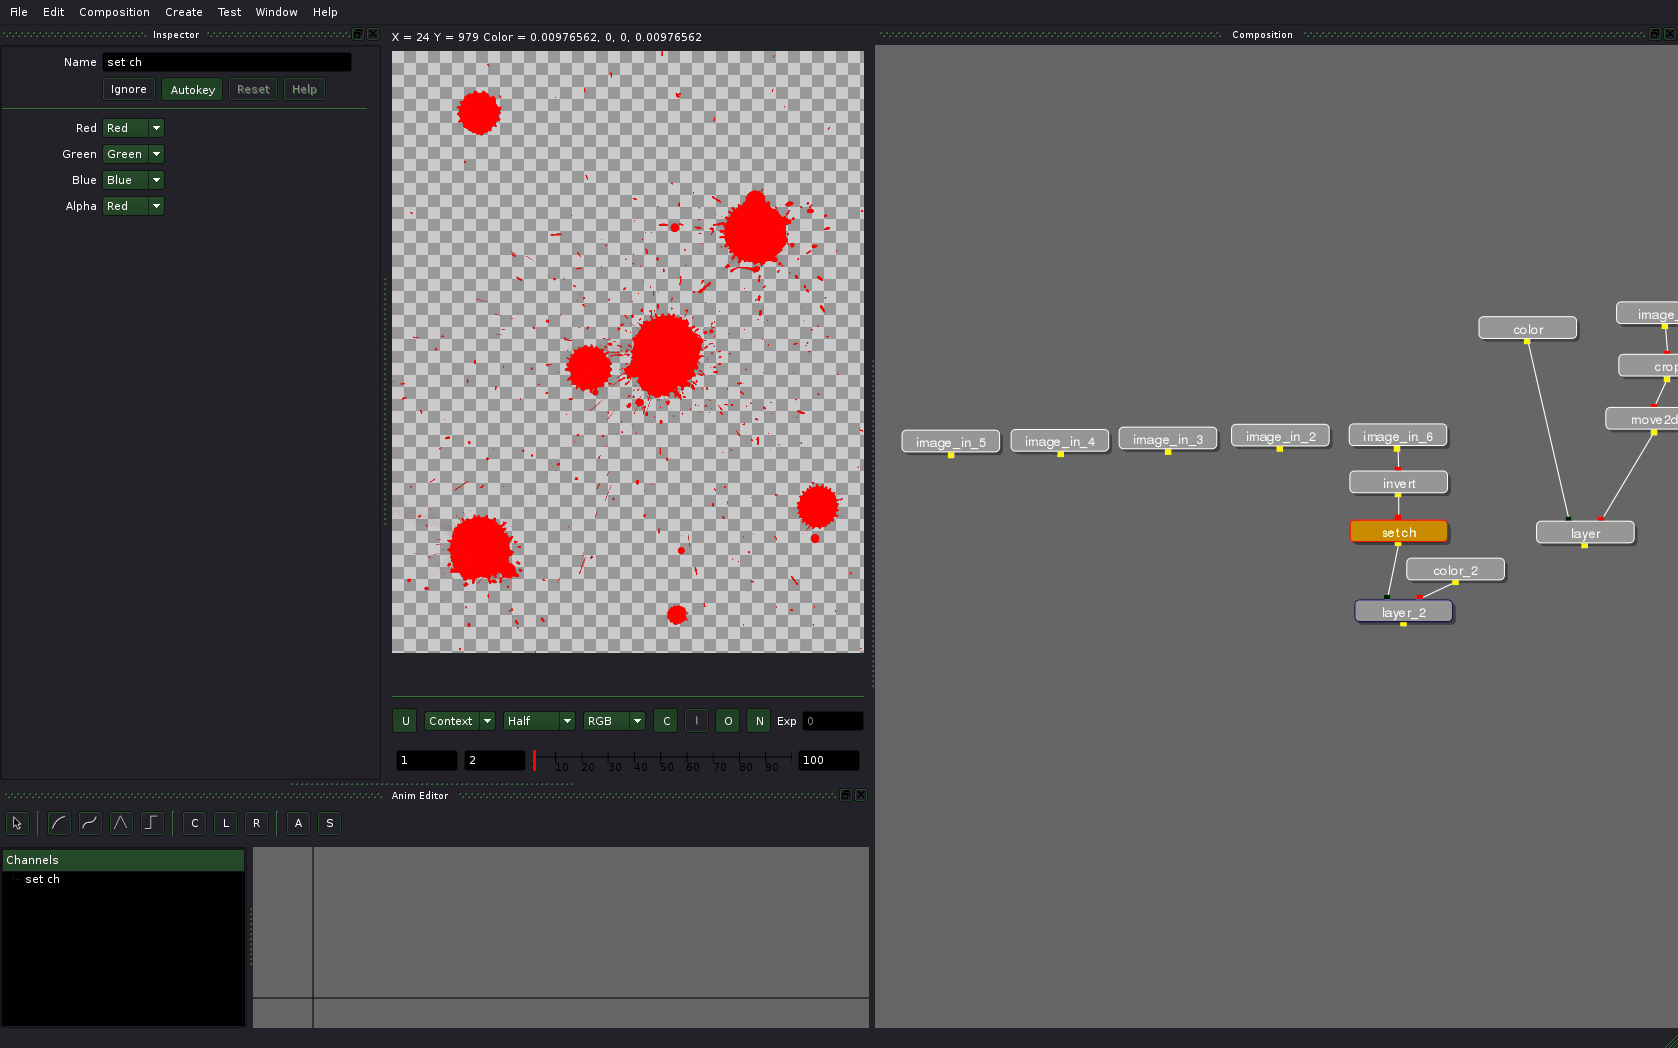
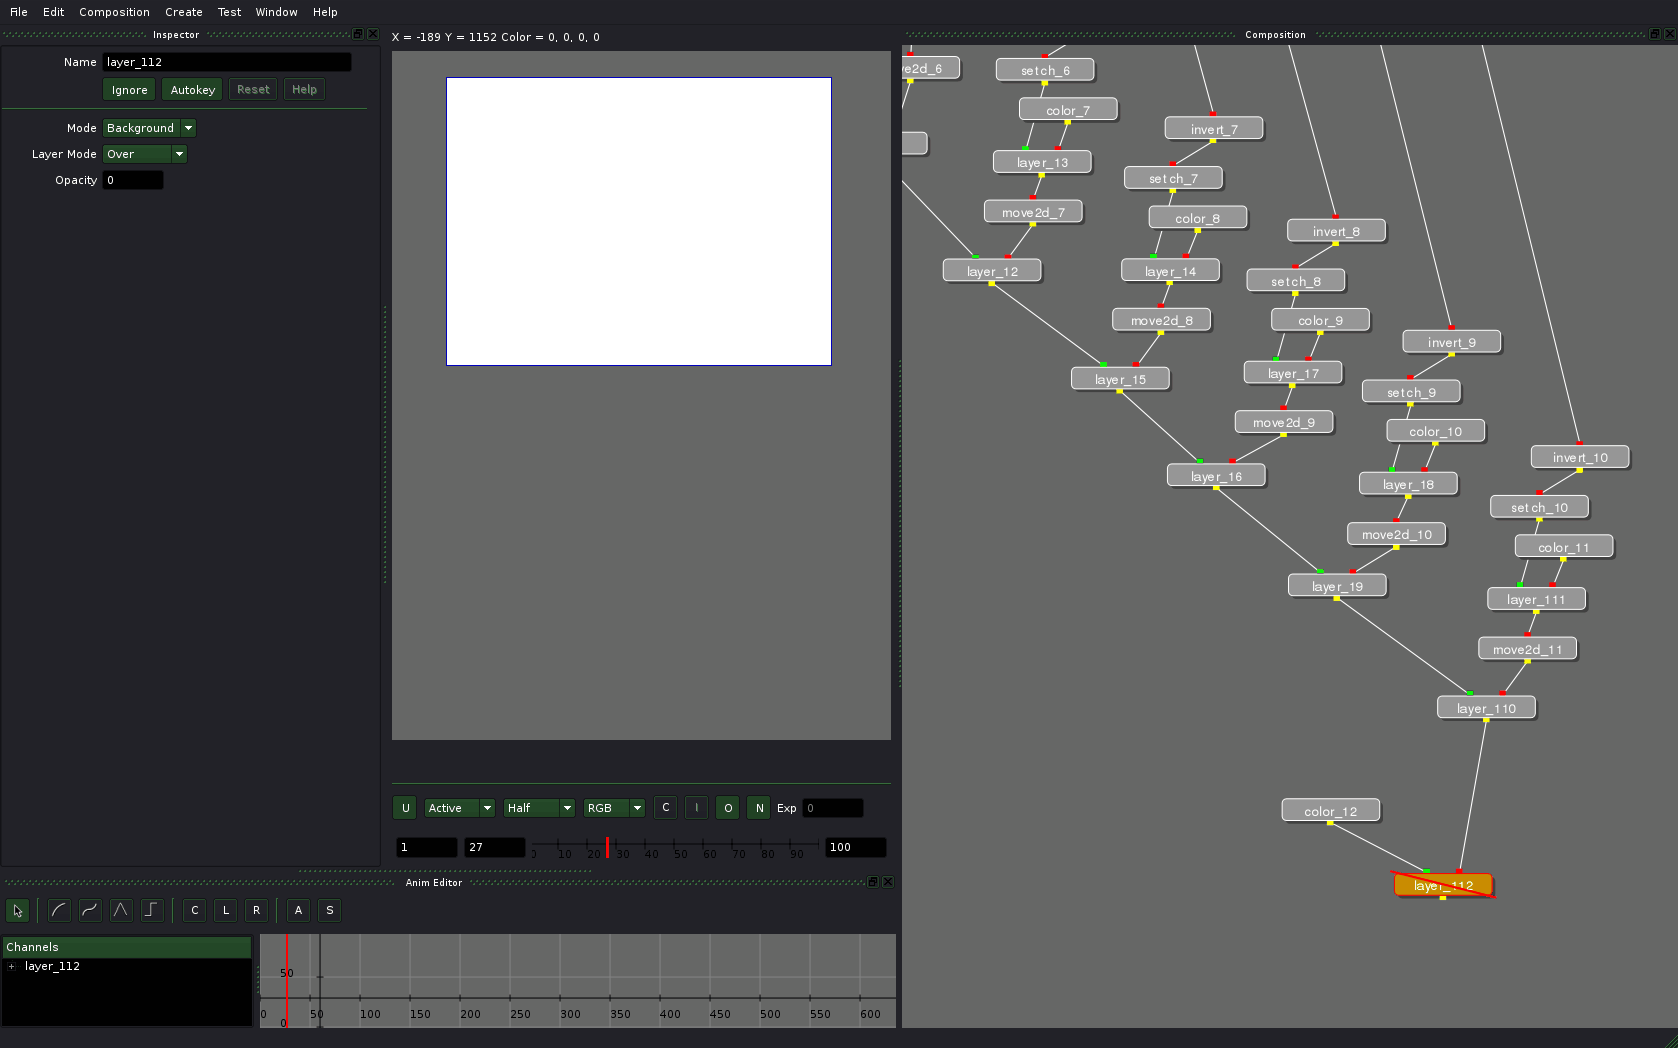
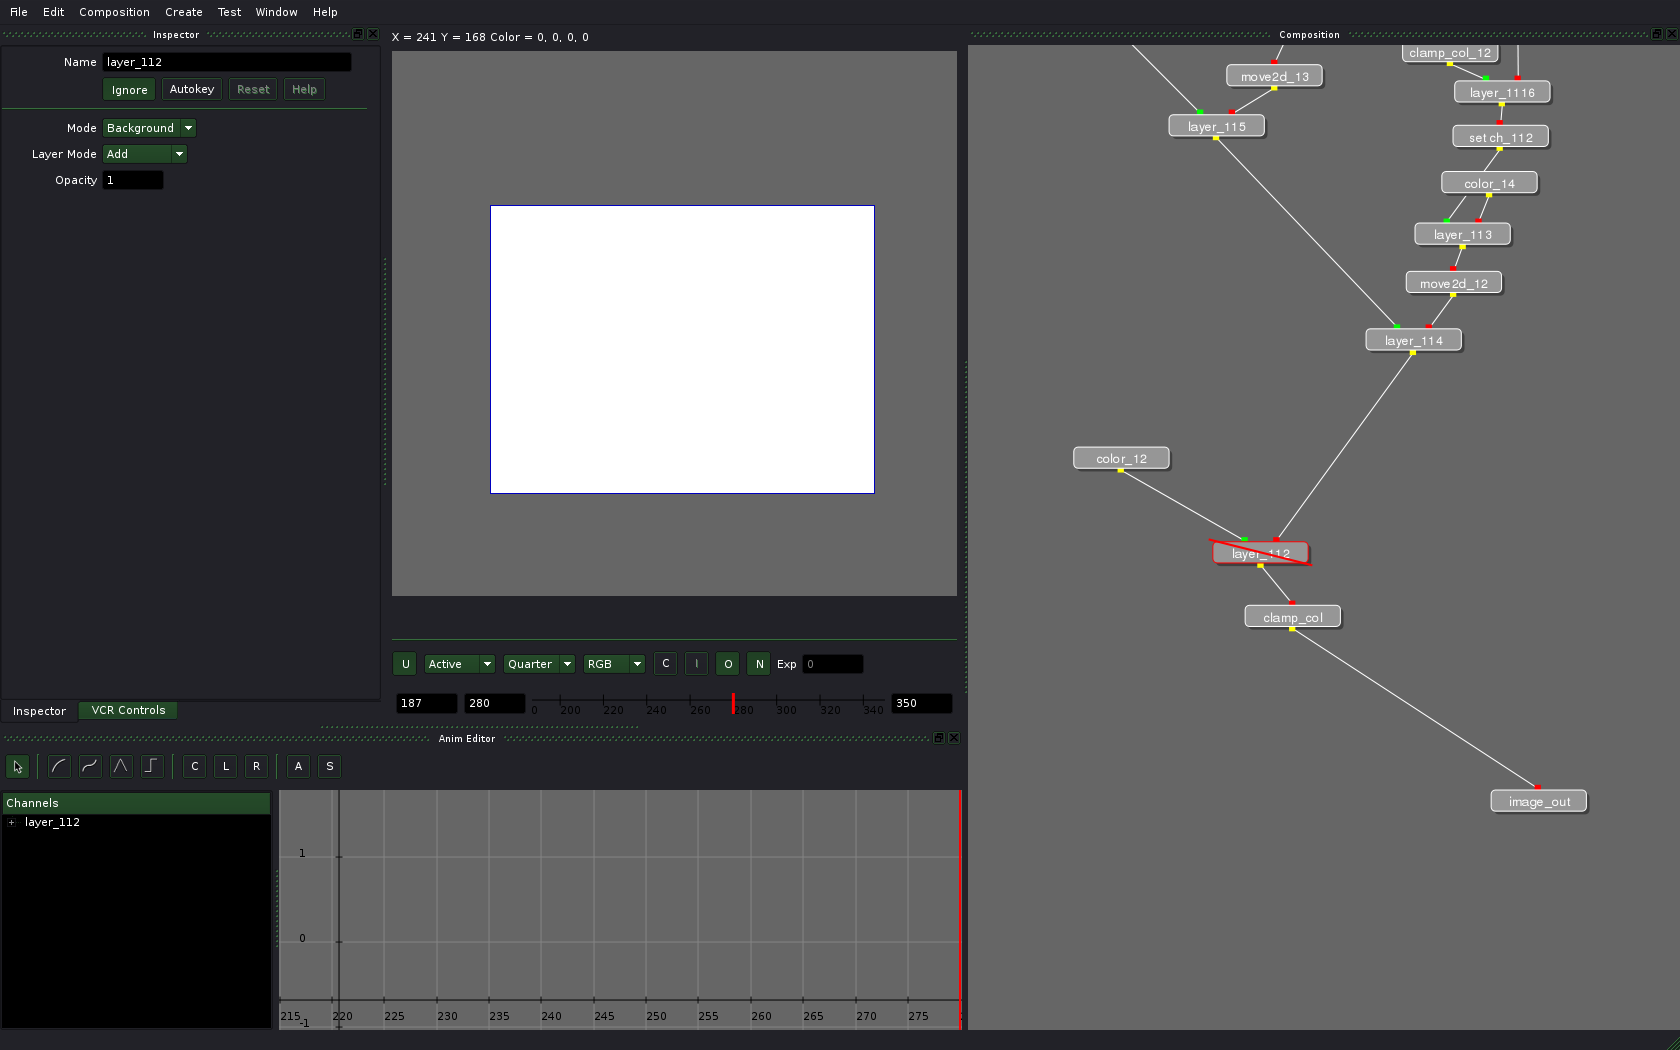
And now let’s invert the image with invert node, then send Red channels to Alpha channel using setch node (in the inspector on the illustration below), then multiply the resulted image with desired color using layer node. While at that, define image size for color node so that our blob mask fills it entirely.
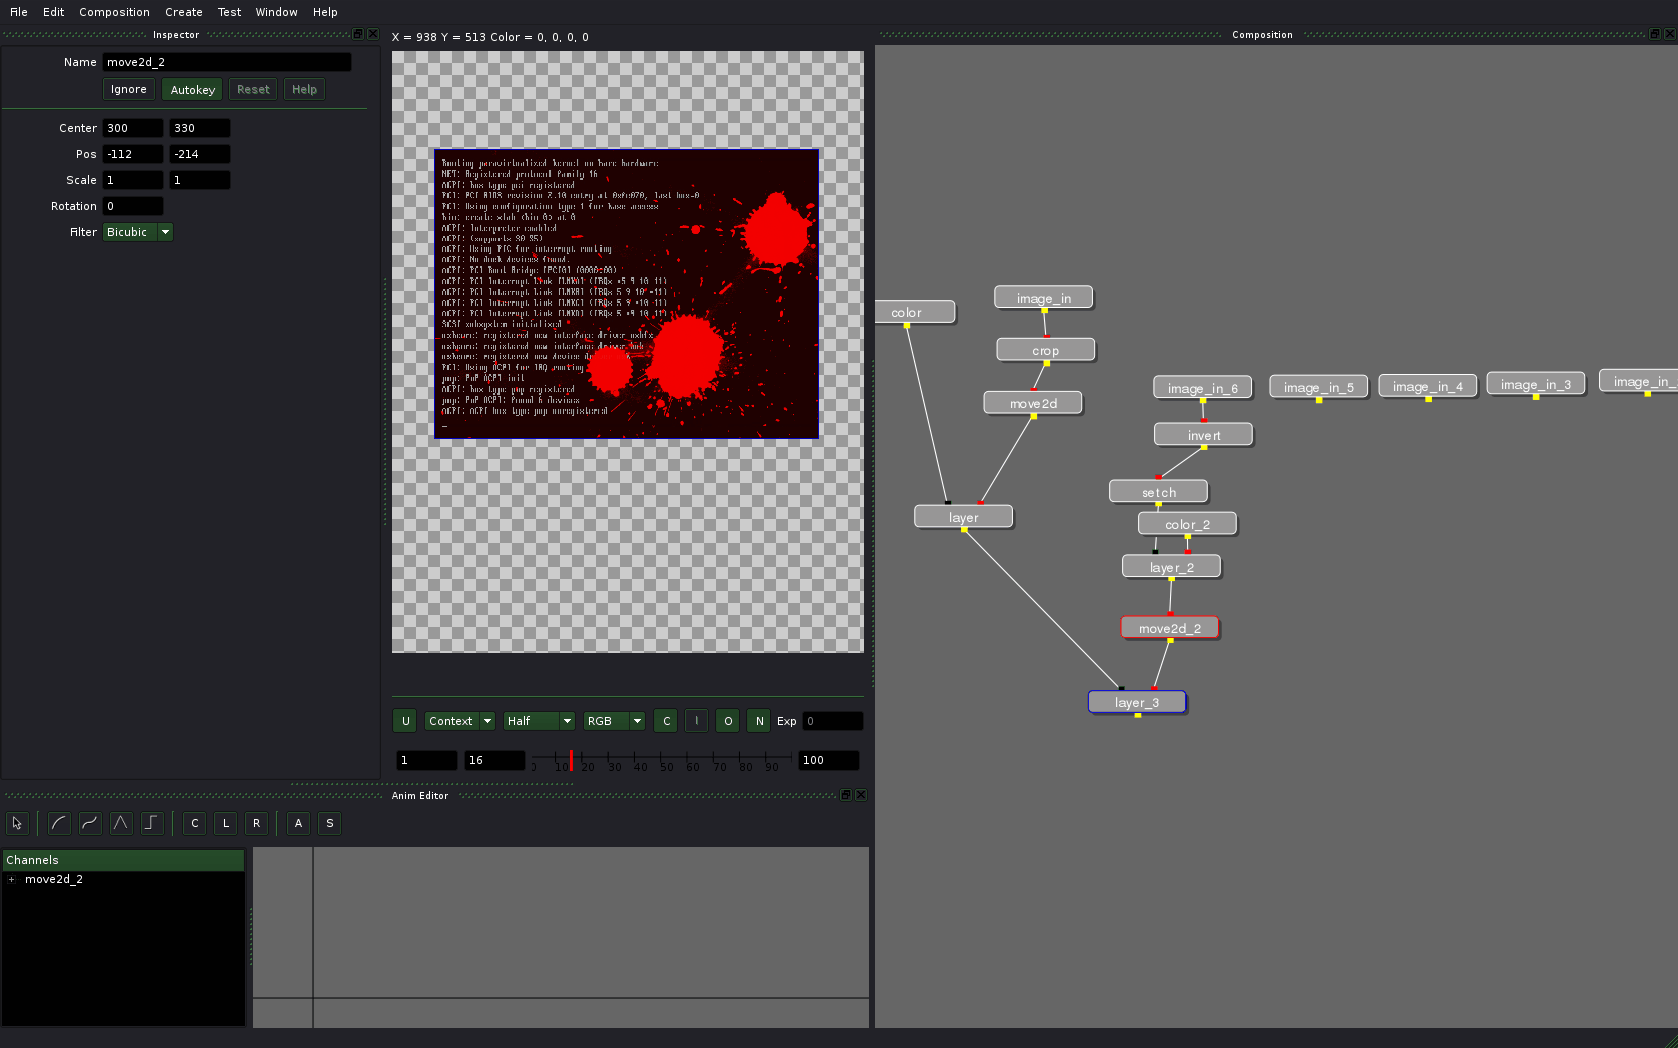
Now add move2d node to reposition blobs on the image and place them above the video of the console.
Change position of nodes to make things look nicer:
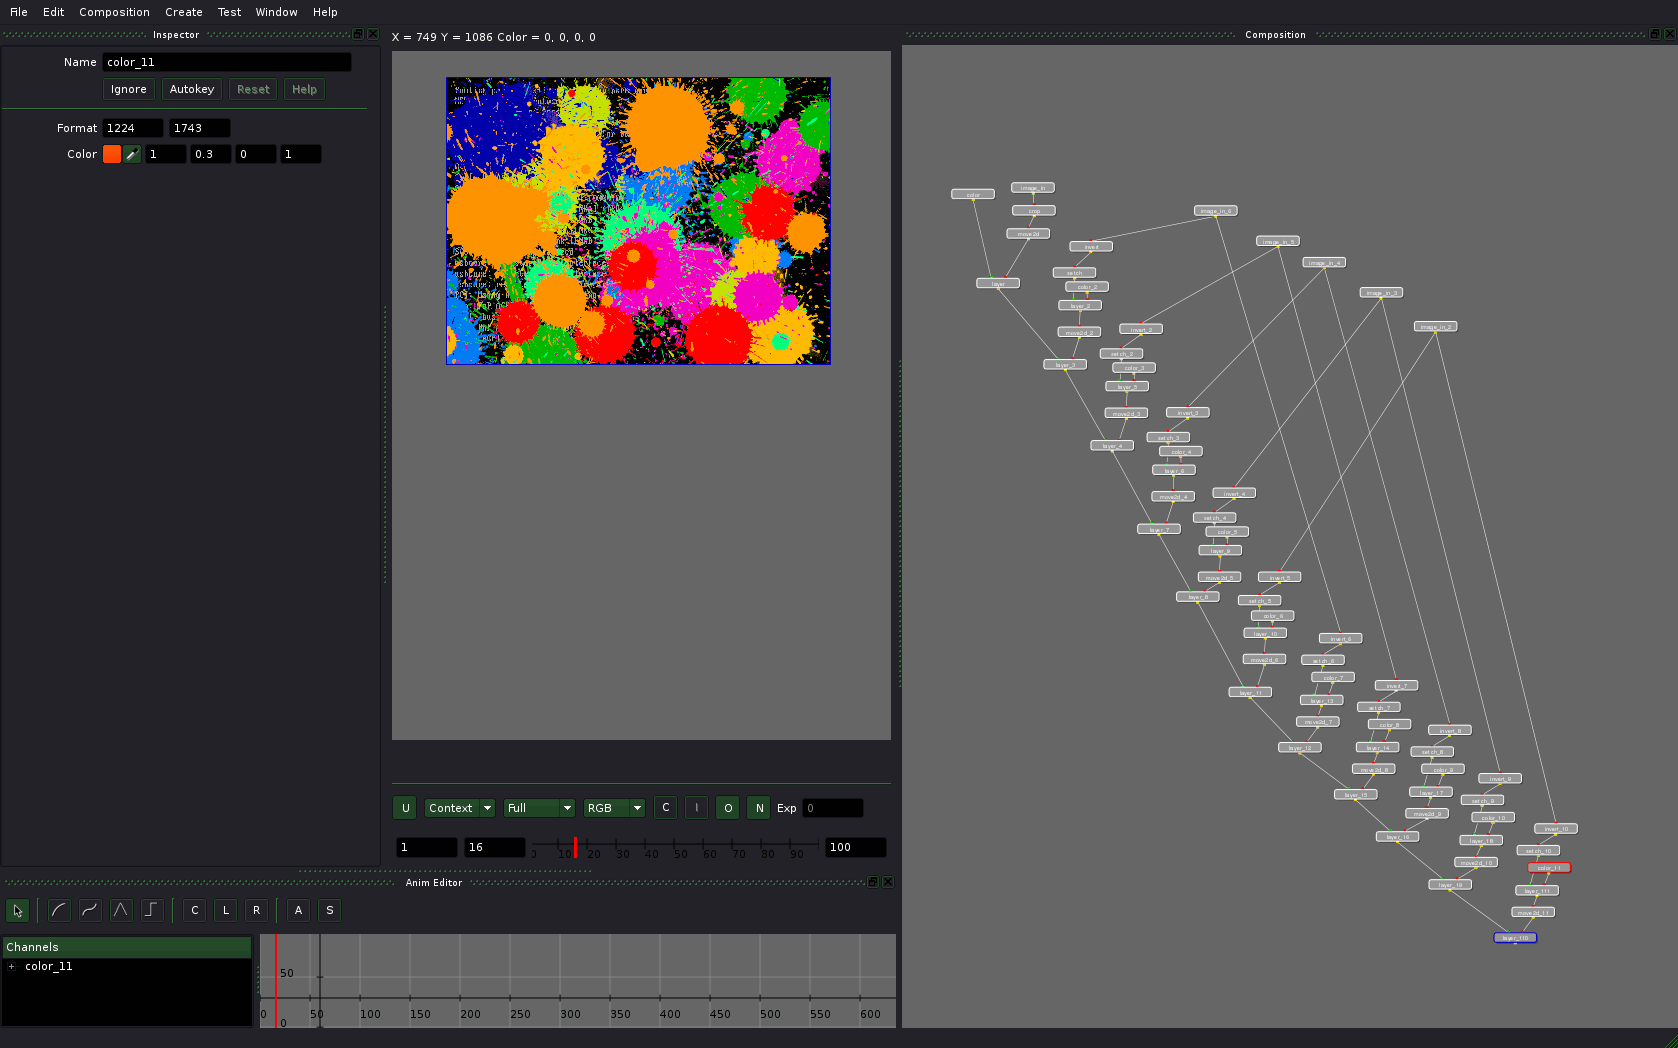
Repeat the above operation several times and you’ll be blown by a hurricane of color:
At this stage rendering already takes some time, so lowering resolution comes as a natural solution. Use the Full/Half/Third/Quarter toggle on the image panel. With “Quarter” options chosen the composition will be rendered in realtime mode or close.
It is time to fade to white now. This transition is also cool, because you can press Ignore button on the layer node and thus discard everything we just did with blobs.
Here is where I thought about the whole thing again. The initial plan was to make blobs appear by raising their opacity. Bit then I thought: why not use a blurred mask to animate smooth fading in of the blobs. (Just a footnote: experiments like that in layer-based compositors are not so easy.)
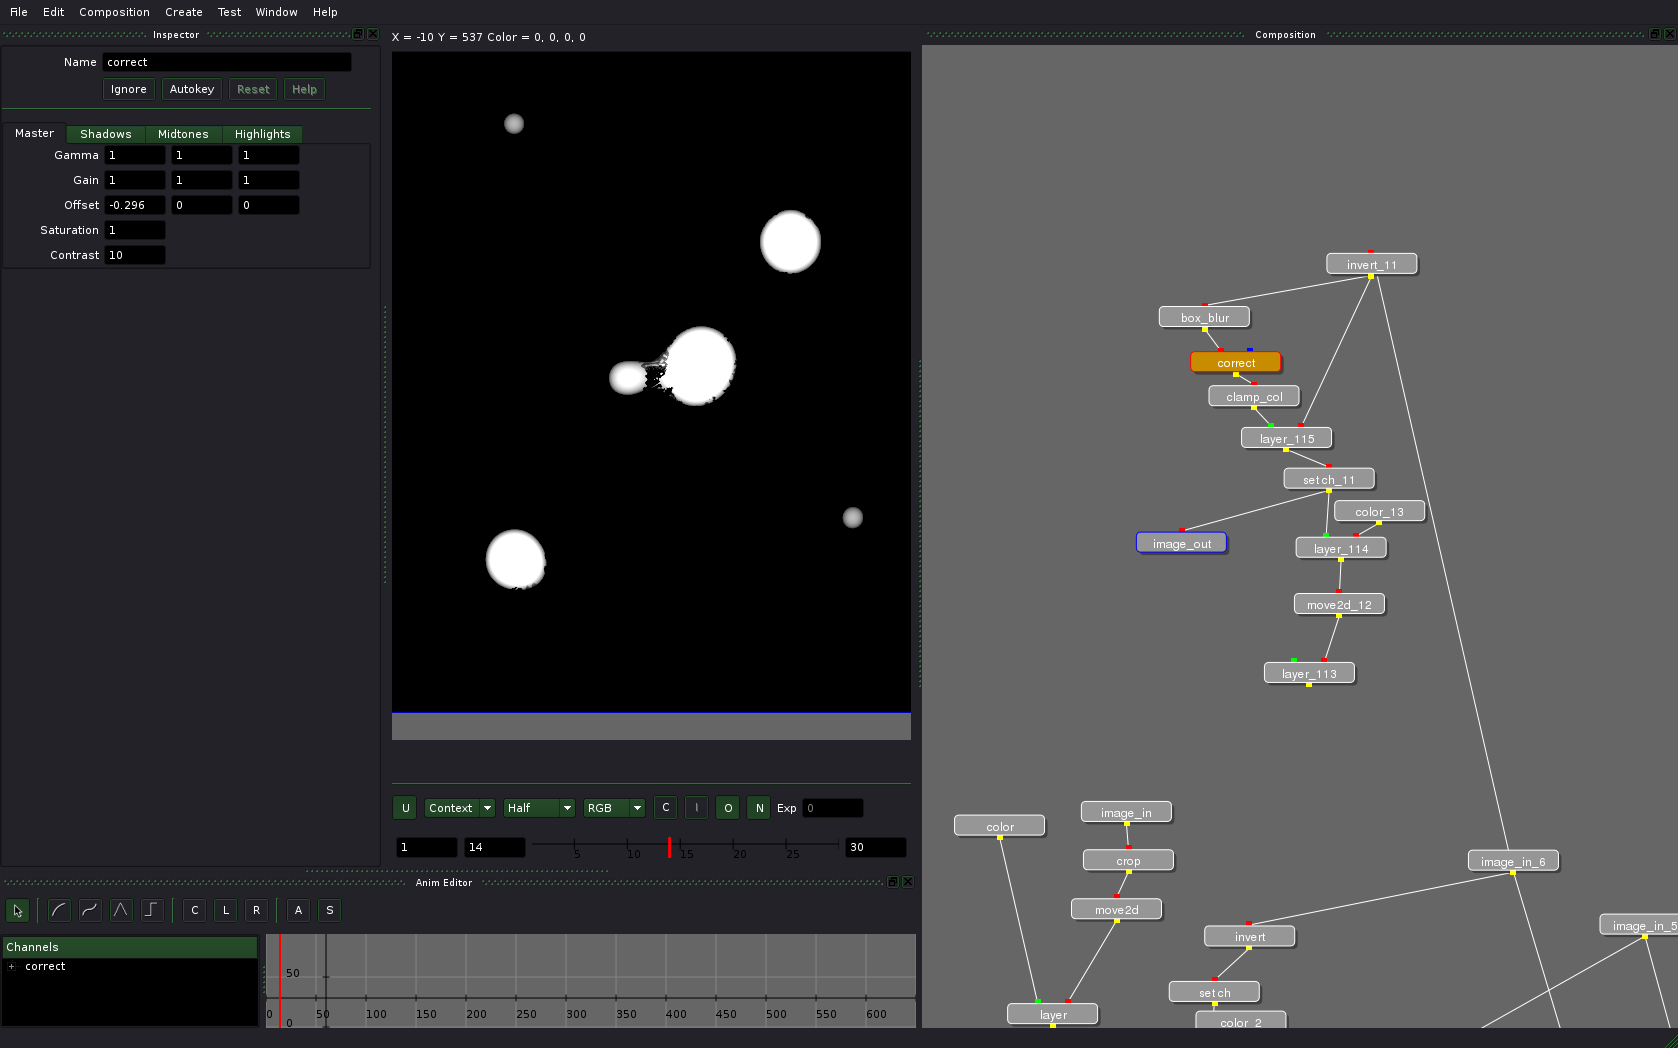
Let’s animate Offset option of the correct mode. The node layer_115 here multiplies source mask with a new one. And the setch node here is configurable to send Red channel to all channels instead of duplication of correct node’s options for all channels.
And the result looks quite neat, eh?

Now the change should be applied with the right timing to all blobs. Since Ramen doesn’t have decent retiming functionality yet, it’s best to think about it beforehand. This might possibly involve pencil and paper :)
After application of this technique the tree grows larger:
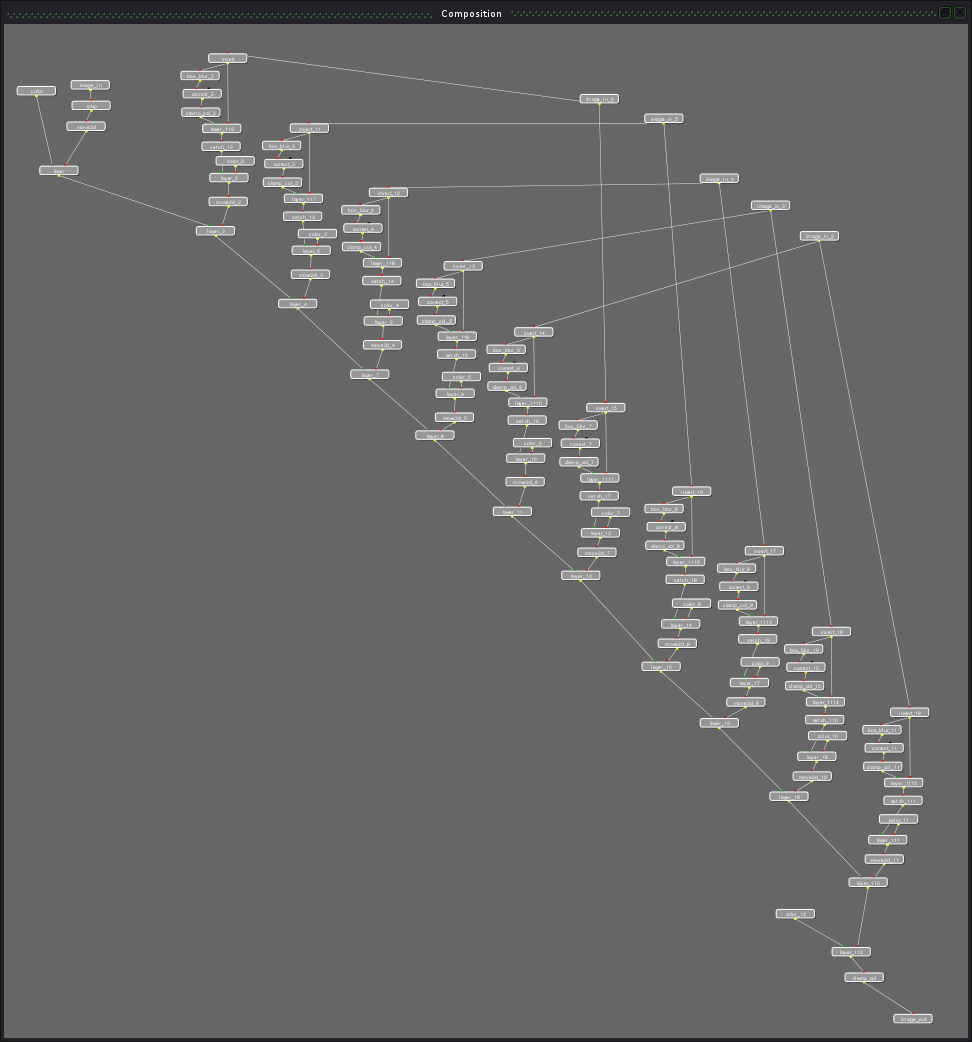
And after duplication of blobs it doesn’t look like tree anymore:
Let’s make sure that this part of the composition works as expected by rendering and checking it, and then we can toggle off the layer node to work on the white background further.
Logo
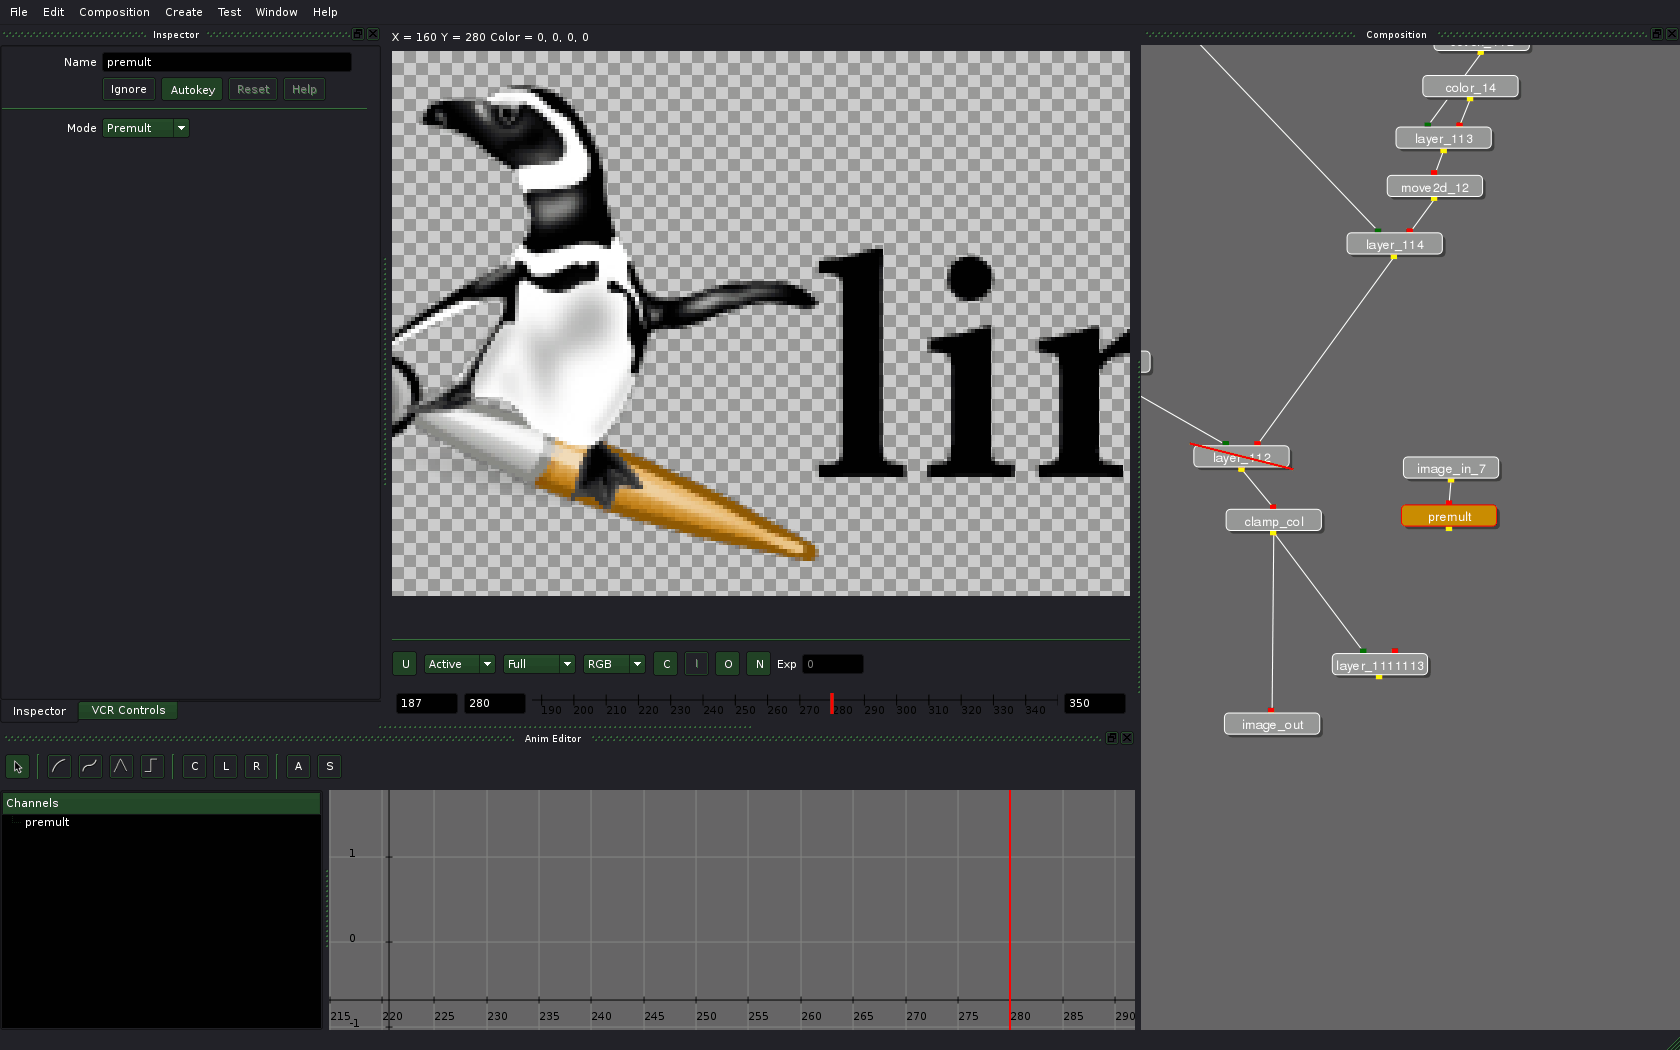
The source logo file was in SVG, so I separated it into several elements in Inkscape and then additionally exported the whole thing to simplify the assembly.
Now let’s add the logo. Since Inkscape doesn’t premultiply while exporting to PNG, we’ll have to do it in Ramen.
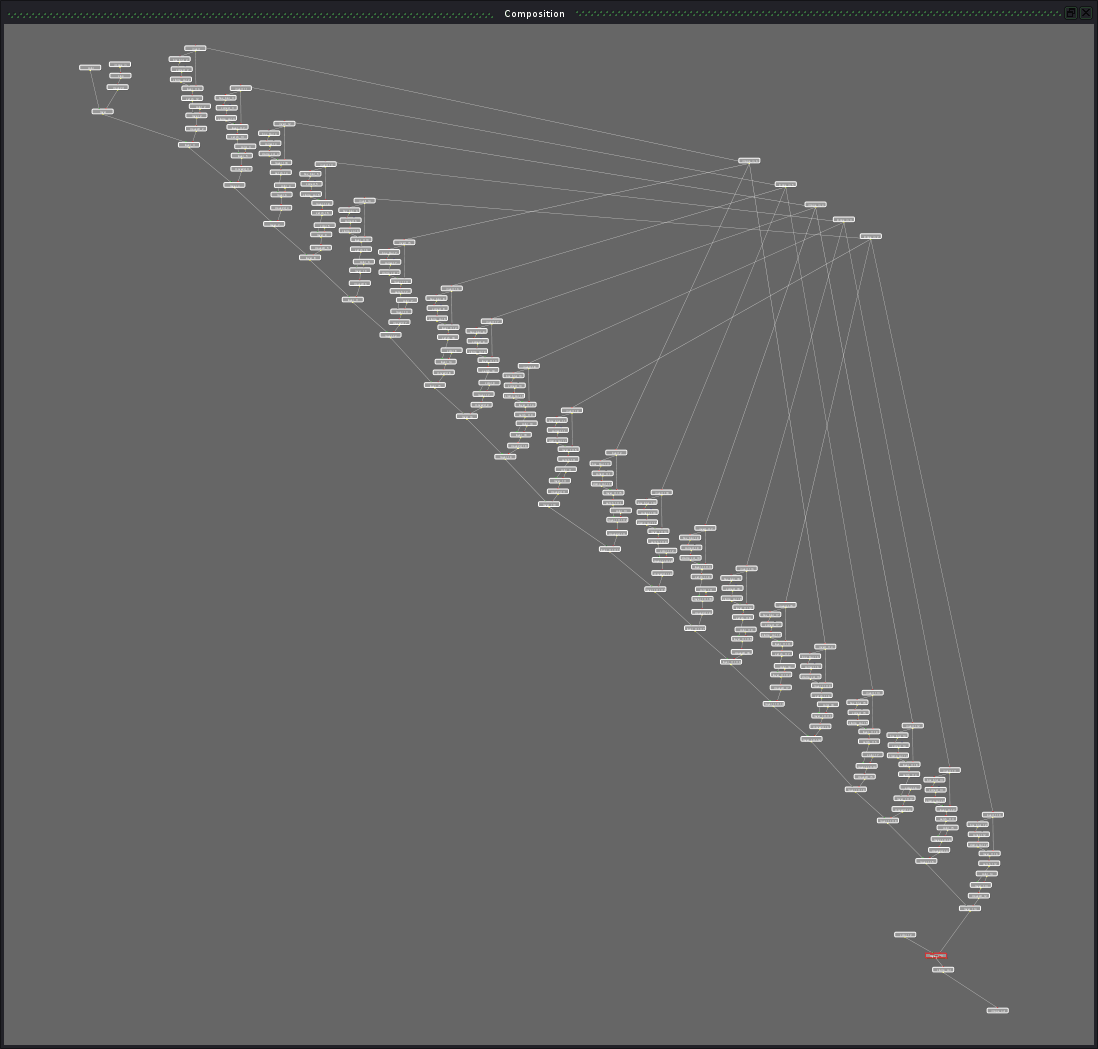
Now let’s place all the elements where they belong and get another staircase:
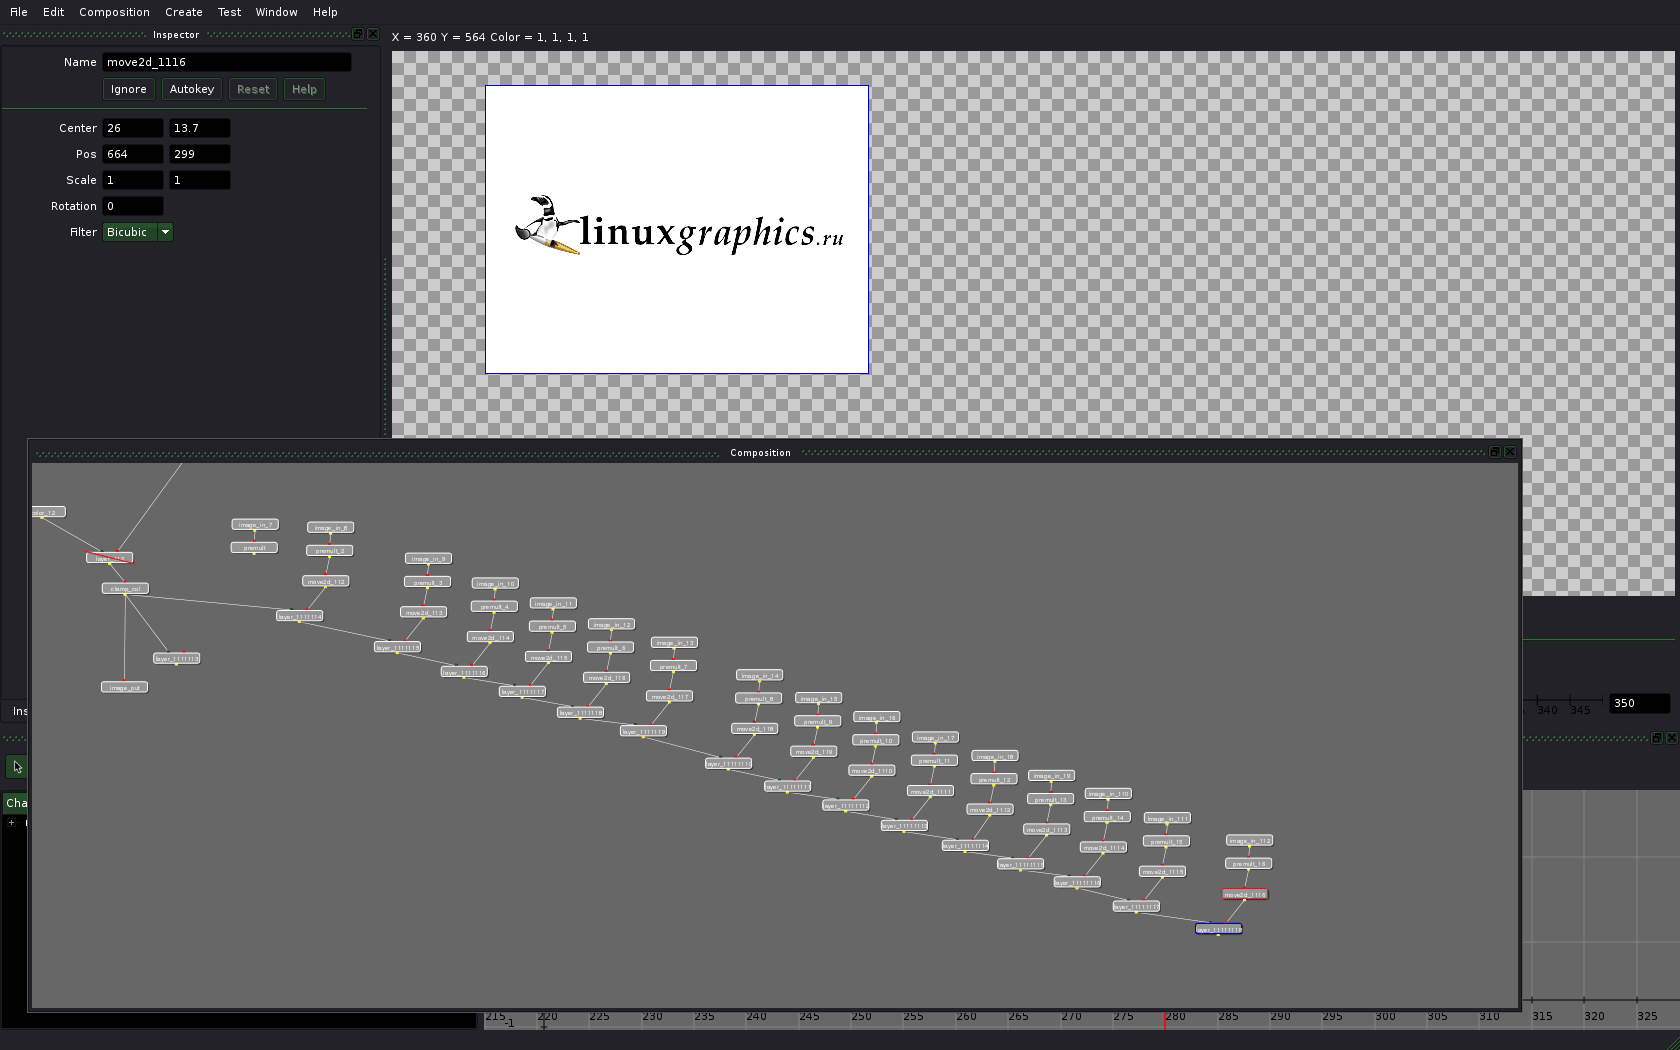
All that is left to do now is animation with Scale option in move2d node’s settings.
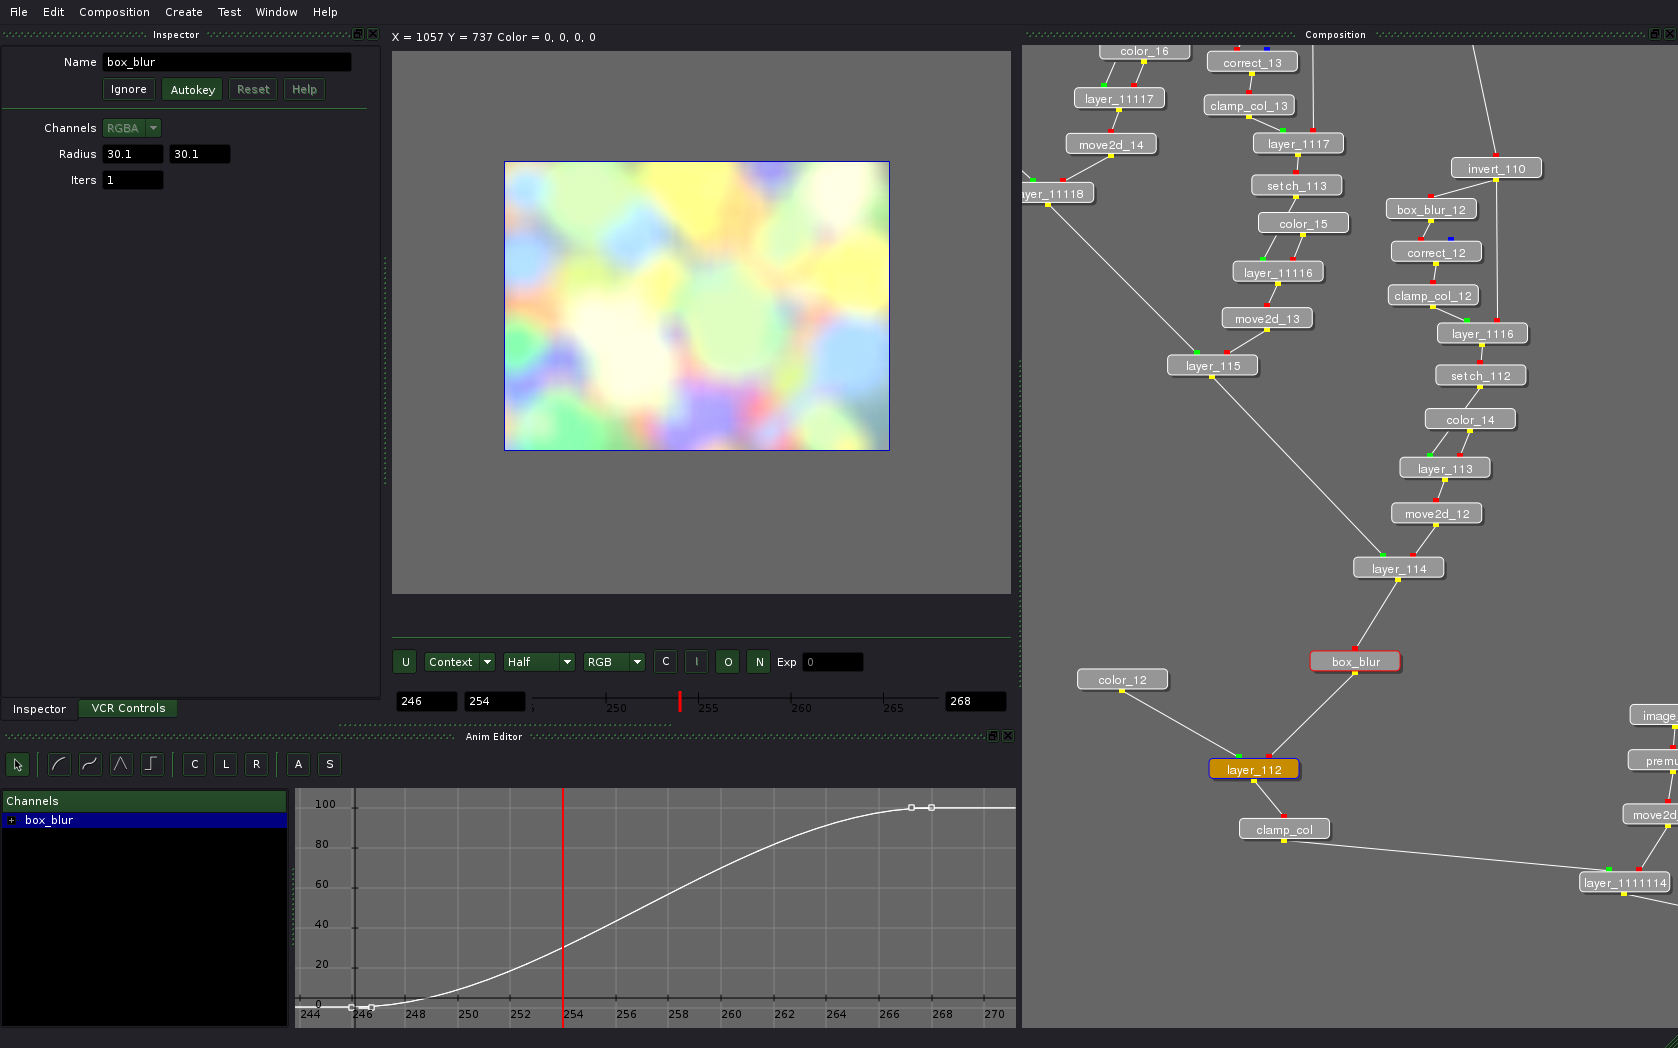
If you want more bling in the composition, you can add blurring of the blobs during transition:
The final video
And here is the resulted video again:
The original Ogg Theora file is here.
Sources
You can download composition sources from here.
Ramen uses absolute paths. Since it makes sharing projects a little painful, I wrote a small Python script called pathfix.py and put it in the tarball. Go to the directory with decompressed composition and execute the script ($ python pathfix.py). Right after that you can open compos.rmn in Ramen.
Conclusions
Advantages:
- usable rotoscoping tools, whee!
- decent user interface;
- built-in flipbook;
- high performance despite of author’s claims that code was never optimized;
- fully working (unlike Blender’s) system of resolution control for preview;
- almost all node settings can be animated;
- basic OFX support, which means you can use plug-ins for Nuke, Toxik, Fusion etc.; it’s currently disabled in binary builds for being buggy, but can be re-enabled if you compile Ramen yourself;
Disadvantages:
- some memory leaks (being currently worked on).
- no on-canvas controls (soon to be fixed, as claimed by Esteban)
- poor retiming functionality (you cannot simultaneously scale/move multiple curves of different nodes yet)
- no tracking and match moving tools.
- no nodes palette, adding new nodes from menu isn’t exactly comfy.
To summarize it all, what we see here is a project with a very rapid start and fast development. And even though Ramen is not ready for projects with deadline yet, it is currently the most likely open source rival to commercial compositing solutions. With a larger team the project could easily become a serious PITA for the big guys.
Plans for future
Everything in this article relates to revision 128 from SVN. Ramen really becomes better with every single commit, so reading the whole article could be a waste of time if you wasn’t told where things are heading to. Short-term goals are fixing most depressing bugs, making the application more robust and easy to use, and also finishing OFX support. As for long-term goals, the way Esteban sees them, it’s rather about creating a feature set comparable to Shake’s. And this means motion tracking, really good rotoscoping, vector paint (a-la Shake’s paint node), scripting and all sorts of optimizations.
What now?
Esteban has a development blog (also syndicated by Graphics Planet). Since recently there also is a forum and there is a Vimeo group dedicated to Ramen now. Here is a keying test video, for example:
The project will be applying to participate at Google’s Summer of Code 2010. The list of possible projects is here.
Patreon subscribers get early access to my posts. If you are feeling generous, you can also make a one-time donation on BuyMeACoffee.