I’m assuming that you already have a grasp of vector graphics. The tutorial itself will improve your skills using the Pen (Bezier curve) tool in Inkscape.
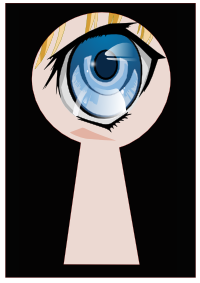
The result should be looking like this:
Start with drawing eyelids using Pen tool. It might take a while, so please be patient. The fuzzy part on top can be created using Tweak tool in Roughen mode. Be careful, however — it’s too easy to create too many nodes in this mode, Force=25 should do. Fill the result with black color.
Draw the white of the eye and place it under the eyelid (use PgDown on the selected object), then fill it with 0,0,0,12 color (CMYK).
Now draw pupil and iris. Easiest way to do this is to draw two ellipses, outline their strokes (Path > Stroke to Path) and tweak the resulted shapes. E.g. for iris you want thickening the left arc of the outlined ellipse which you can do by selecting and shifting nodes on the outside to the left. Or you can draw the paths from scratch.
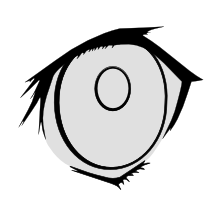
Now use Fill and Stroke dialog to fill the pupil with 80,50,0,75 color (CMYK), and the iris — with a radial gradient going from 100,35,0,35 (CMYK) to 70,35,0,55 (CMYK again).

Then use the Pen tool to create highlights objects and fill them with 20,10,0,10 color (CMYK). The objects don’t have to be geometrically perfect, but you might just like to make them so.
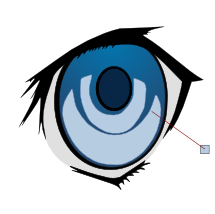
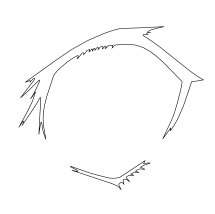
Next step is to create a shape like on the illustration below. It will take some time. Easiest way, again, is to draw the basic oval and then just populate it with nodes and drag them into position. And the best way to fill it with nodes is Add Nodes… extension (Extensions > Modify Path > Add Nodes…). Or you can select some nodes and repeatedly click appropriate button in Node tool’s options toolbar or even just press Ins key on the keyboard. When you are done, fill the shape with 55,25,0,15 color and lower opacity to 50%.
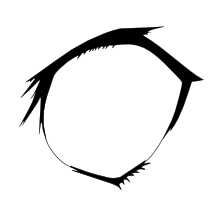
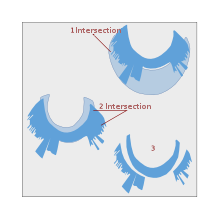
Create two copies of this object, shift them vertically relating to each other and use Path > Intersection (Ctrl+*****) to get such a shape:

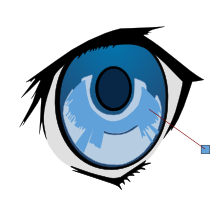
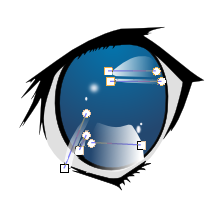
But the iris is not exactly flat, eh? So let’s add some depth using highlights. Use the Pen tool to create several objects like on the illustration below:

Fill the larger highlights objects with gradient going from pure white to full transparency. Then apply Gaussian blur (easiest way is to do it from Fill and Stroke dialog) to the smaller objects. Use different radii for blurs.
Now you only have to create a grey shadow from the eyelid. Use 0,0,0,30 for that shadow (CMYK again):

That’s all!
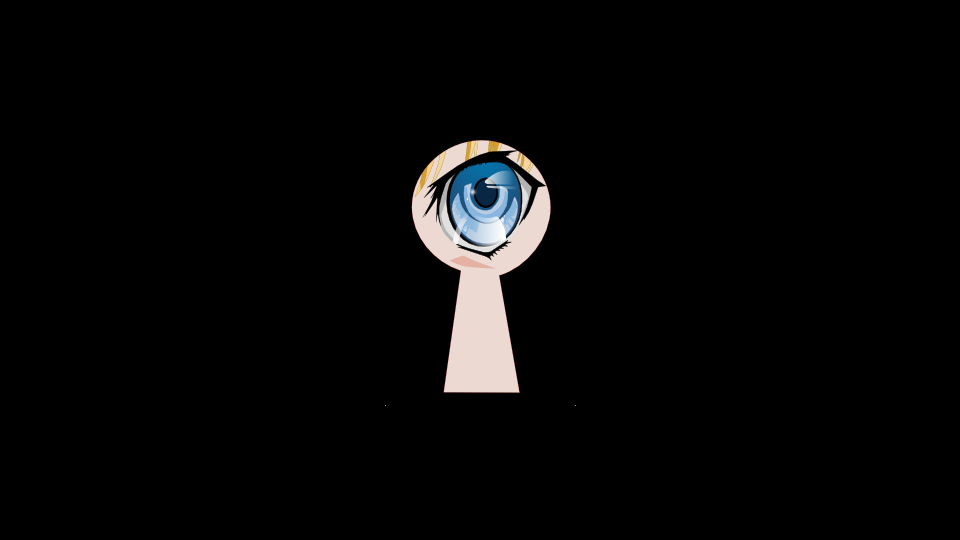
Oh, and if you want the eye-spy bit, feel free to add the keyhole above the whole thing. It’s as easy as:
- Drawing a rectangle
- Drawing a circle above it
- Selecting both and using Path > Difference (Ctrl+-)
- Drawing a rectangle, outlining it (Object > Object to Path) and dragging both bottom nodes away from each other horizontally
- Selecting both shapes and using Path > Difference (Ctrl+-) again
And now it’s really all ;)
Patreon subscribers get early access to my posts. If you are feeling generous, you can also make a one-time donation on BuyMeACoffee.