Using color tools presets in GIMP
by Alexandre ProkoudineHere is how you can create your own presets for color tools
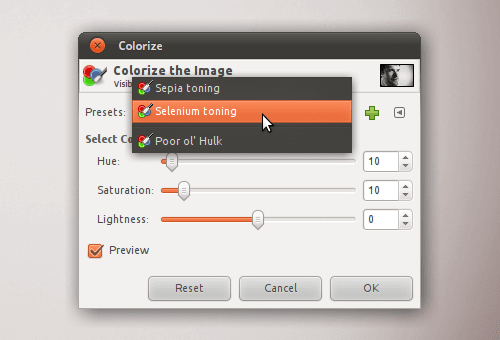
In this GIMP tutorial, we explain how to use color tools presets to preserve favourite settings of Levels, Curves and suchlike for further use across sessions.
If you used GIMP 2.6 long enough, you couldn’t help but noticing that every color tool from the upper half of the Colors menu except Desaturate features a combobox and few buttons on top of it. Not everyone ventured to get a grasp of this quite useful feature called named Presets, so let’s have a closer look at it.
Creating Named Presets
Say, we took a picture processed in darktable that has more or less right exposure and even added vignetting. So we corrected exposure for eyes using a mask on a copy of this layer with Screen blending mode, created a new layer from everything visible and now on this new layer we want to add colorization to simulate Sepia:
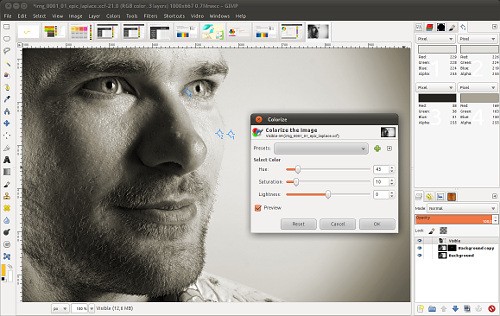
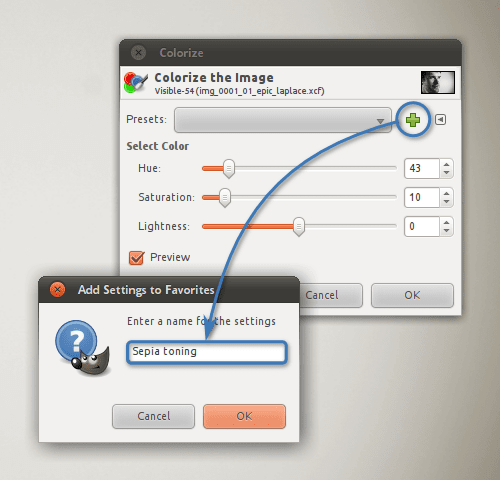
We like the effect and we don’t want to memorize the settings. What do we do? We save these settings for future use by giving it a self-explanatory name. It’s really very simple: just click the + button and tell GIMP what the preset should be called:
All presets you added end up in the list, so at any time later you can simply choose a preset by it’s name:

Managing Presets
Well, colorization is not exactly an often used feature (of course it depends). The real working horses, at least in photography, are Levels and Curves. They are used very often, and mostly you apply unique changes that vary from picture to picture, so it doesn’t always make a lot of sense saving named presets. Again, it depends.
What happens, when you don’t save a named preset and simply apply a color transformation by clicking OK? The preset is memorized anyway, every time you apply a transformation. Which means that after a while the list gets bloated which also slows down GIMP a bit.
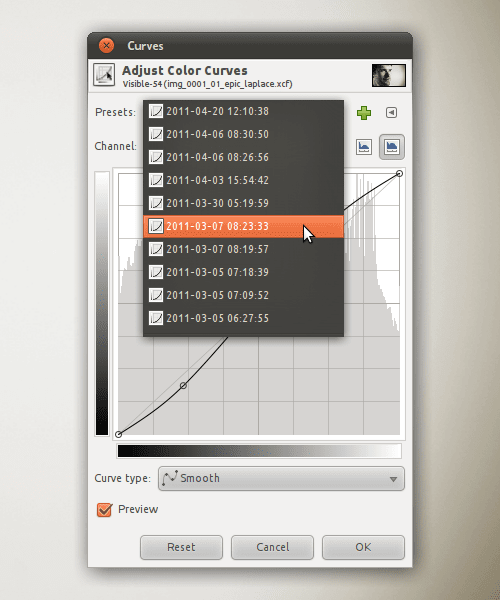
The Curves tool gets the worst of it simply because every preset contains a lot of data in comparison to other color tools (an automatically saved list of presets that is over 1MB is not so uncommon). So this thing needs cleaning up.
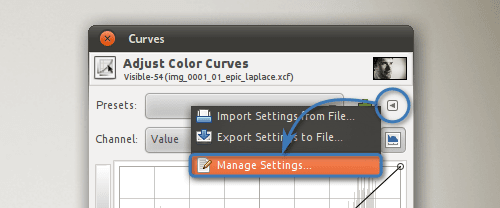
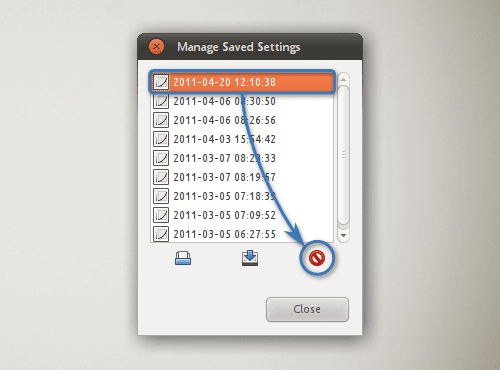
The settings management dialog is very simple. Perhaps even too simple. To delete a preset just select it in the list and click a Delete button below.
Sharing Presets
This is kinda obscure bit, because right now GIMP can’t export all your named presets of a color tool to a single file to share with someone else. In fact, the buttons for importing and exporting presets from within Manage Saved Settings dialog won’t even react. The team is well aware of that, it’s just some code currently missing, which will hopefully be fixed in one of next GIMP releases.
So right now if you have a preset you want to share, you will have to click the triangle button again and use Export Settings to File menu item.
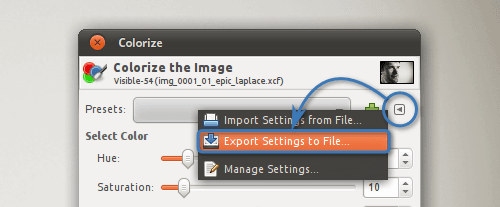
GIMP will only save timestamp for the preset (in UNIX time format) and actual settings. Name of the preset won’t be transferred — actually, it’s because GIMP forgets it used a preset as soon as it’s applied. But you can just give a meaningful name to your file.
Conclusion
Color tools presets are a smart way to simplify simple repretitive color adjustments with GIMP. If you are active user of tools such as Levels or Curves, you will find it a handy asset in your toolbox.
Patreon subscribers get early access to my posts. If you are feeling generous, you can also make a one-time donation on BuyMeACoffee.
