How to make washed-out and golden skintones in darktable
by Alexandre ProkoudineHere is how you can do it in just four simple steps
A fellow darktable contributor asked about the washed-out effect he discovered in one of my pictures. Here is how I do it.
First, the photo in question:

Normally, when you want to adjust skintones in studio environment, there always are golden and silver reflectors around. That’s the right way to do it. But if you really mean the global washed-out effect, you could make use of darktable.
The trick is basically a two-step operation: raising color temperature while lowering saturation. So here is the original image:

- Raise the exposure by 1.5EV:

- Switch back to the basic tab and in the white balance plug-in drag the temperature in slider all the way to 12K:

The effect is eye-watering, but we’ll fix it in the next step.
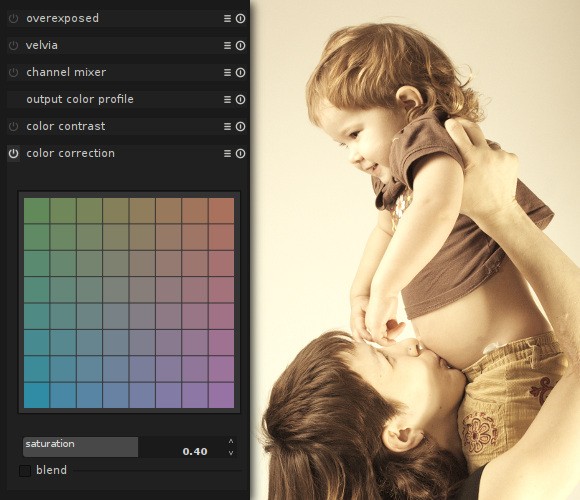
- Go to the color tab and lower saturation in the color correct plug-in. If you go for 0.40, you get nice goldish skintones:
If you go for 0.20, you get the exact washed-out look of the final image:

- Bump the clarity by applying a highpass filter in overlay blending mode.

As you can see, it’s really fairly simple. However the effect can be rather harsh depending on scene, and while it works on girls and babies, it doesn’t exactly work on flowers and squirrels. Puppies and kittens? Mmmaybe. Use it wisely.
What are your favourite darktable tricks?
Patreon subscribers get early access to my posts. If you are feeling generous, you can also make a one-time donation on BuyMeACoffee.