The FAQ flavored series of Inkscape tutorials continues. Another popular question I keep hearing is in the lines of “Um, how exactly do I set a default page size?”. Welcome to the world of templates.
What’s a template in Inkscape
A template in Inkscape is a regular SVG document such as you create every time launch it. What actually happens when you start Inkscape is that it looks for a file called default.svg in your local Inkscape directory and loads it. If it can’t find it, it takes a system-wide available default.svg file, copies it to your local Inkscape directory and uses the newly saved default.svg file.
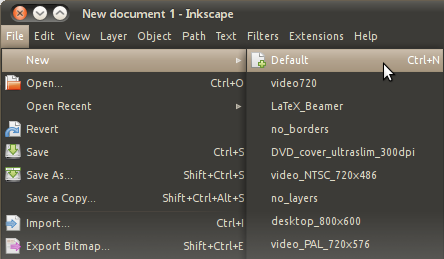
The same thing happens when you press Ctrl+N or use “File > New > Default” menu item:
Local directory? System-wide directory? Ugh?
A local Inkscape directory is the one that is created per user in a system. The location depends on your operating system:
- For Linux and Mac it is
~/.config/inkscape - For Windows it is
%APPDATA%\\Inkscape(just use it in Explorer as is)
So if you want to have default documents with e.g. a different page size, all you need is to create a new document, change page size and save this document as default.svg inside templates folder of your local Inkscape folder. Here is a step by step guide:
-
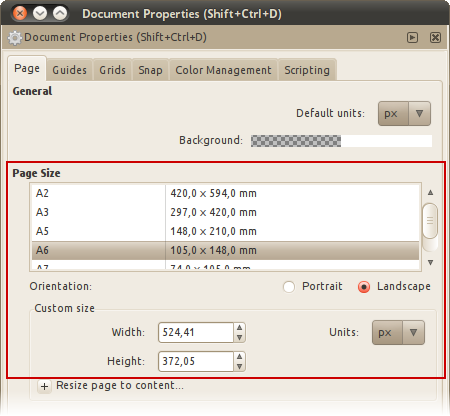
Start Inkscape and use “File > Document Properties” menu item (or press Ctrl+Shift+D) to open a dialog where you set various properties of a document.
-
On the first tab called Page choose a new page size from presets or define your own page size. You can also arbitrarily switch between units such as px, mm and pt.
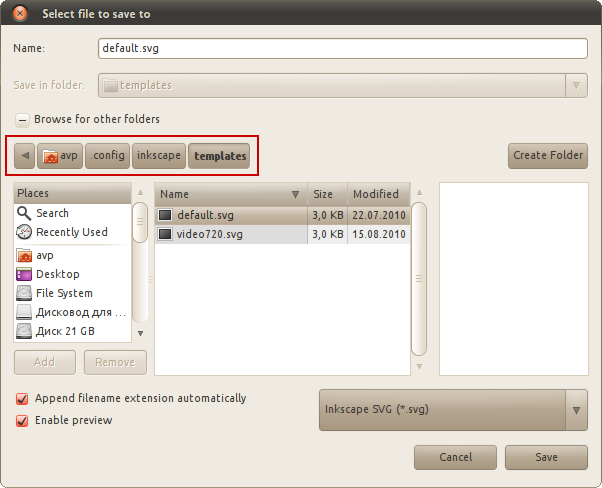
- Close the dialog, use “File > Save” menu item or press Ctrl+S for saving. In the newly opened dialog go to your local Inkscape folder (see above), then further inside go to the
templatesfolder and save asdefault.svg, overwriting the existing document. The screenshot below illustrates that for Linux:
- Restart Inkscape to check that default document has a new size.
That’s all, really. But can other things be default? Yes.
Defaulting
Here is the list of most useful things that can be made default for a document:
- Units. If you don’t work on display graphics, you probably want either metric (mm) or royal (in) system. Or maybe you want points (pt) or picas (pc). On the Page tab of the Document Properties dialog choose default units:
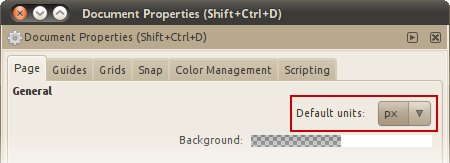
This will affect both ruler and Selector’s options in the tool’s options toolbar. Most extensions will keep using pixels as units though.
- Guides and grids. You can set your own color for guides, or e.g. set axonometric grid as default grid and tweak its many options. Just open the Document Properties dialog, go to Grids tab, choose type of a grid and click New button to the right from the list of possible grid types.
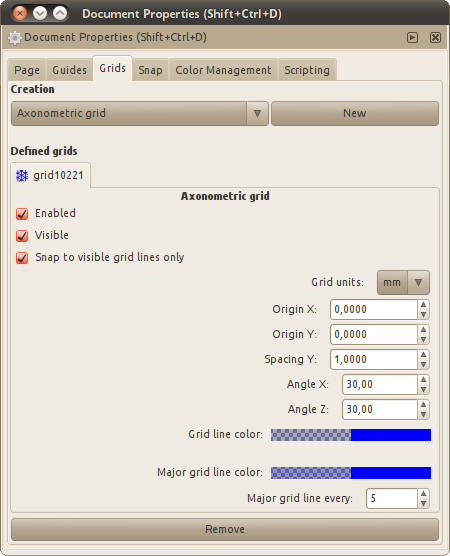
Now every time you press # or use “View > Grid” menu item, the grid you defined will show up. You can even use multiple grids, which can be useful when you work on e.g. pixel art. Just add a new rectangular grid in the same dialog.
- Metadata. Use “File > Document Metadata” menu item to open a dialog where you can define various information about a document. The minimum is setting your name as creator of every document created by default, as well as default license, but you can save much more than that.
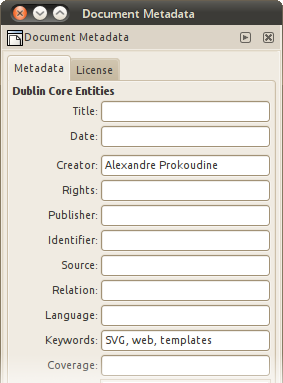
By default Inkscape doesn’t write any information about creator and sets Proprietary license. For example if you intend to contribute to Open Clip Art Library, you definitely want setting Public Domain for a document instead, as well as adding keywords.
-
Snapping. The topic of snapping deserves a dedicated tutorial. For now let’s just say that on the document’s level you can define behavior, which is on the Snap tab of the Document Properties dialog, and what snaps to what, which is in the Snapping toolbar (vertical toolbar on the right side of Inkscape’s window). Just click on the buttons to decide what snaps by default, then save
default.svgfile. -
Zoom level, window size, position and mode. When you save your document, Inkscape writes information about current zoom level of a document, as well as about size, position and mode (maximized or not) of the window that contains this document. E.g. if you want Inkscape to always open default window maximized, just maximize the window before saving.
More templates?
Now, one question you might be asking yourself is whether you can save more templates than the default one. The answer is “Yes, of course!”. All you need is setting all the things you want and saving a new SVG file to local Inkscape’s templates folder. After restarting Inkscape you will see the templates you added in the list in the “File > New” submenu.
In the example given above regarding Open Clip Art Library you definitely want setting Public Domain license for a new, non-default template, otherwise you end up licensing all your new work as public domain which is commendable, but probably not what you intended to do.
And because, once again, we are talking about regular SVG images, your templates can have custom background or some pre-added graphics. For example, when I was working on a screencast demonstrating new GIMP’s slider for tablet users, I created a new document that is 1280×720px large (a video frame size), disabled visibility of page border, added a vignetted background, several layers with predefined names and saved the document as a template, so that I could easily create new documents for the screencast on top of it.
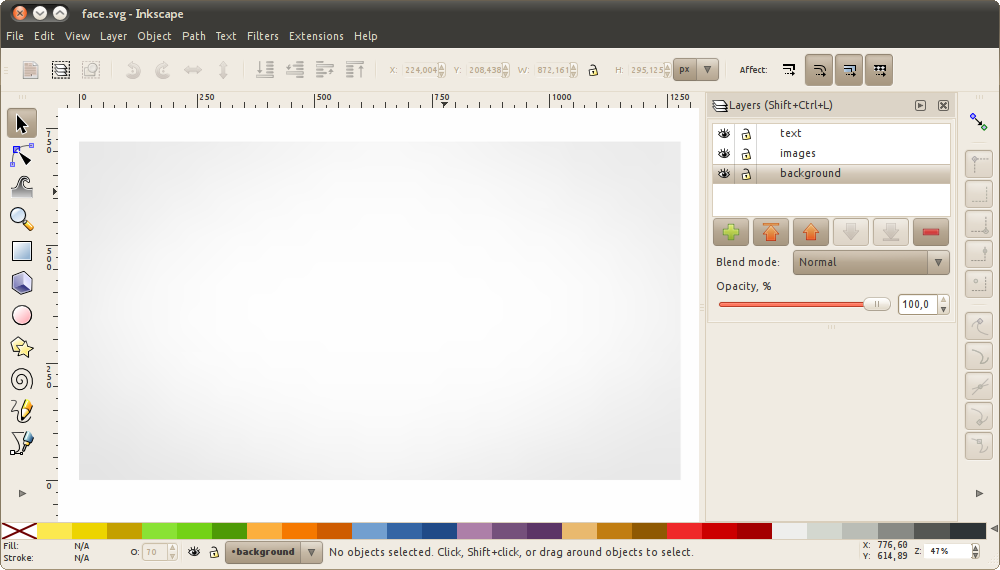
Of course this can be used just as well for things like corporate publications, branding packages, website design and so on and so forth. It’s entirely up to you what you want to be a template.
The final note is regarding deletion and renaming of templates. The GTK+ dialog doesn’t allow either of them, so you have to do it from file manager. Mac users will have to access ~/.config/inkscape from Finder which is done via top menubar: just choose ‘Go > Go to Folder…’ (⇧⌘G) and enter this path. Linux users can use same path in Nautilus or Dolphin or what is it they they used intead of them. Windows users can input %APPDATA%\\Inkscape\\templates in the address bar in in Explorer as is.
The future
The existing templates system is probably not very discoverable, especially when you are accustomed to e.g. Adobe Illustrator where you define page size when you create a new document. And surely we could do with a better way to browse templates.
Chances are that one of future versions will have a new dialog where you can preview templates and create new documents based on some rules. A blueprint for that dialog has already been written, work on it started a while ago, but there’s no promise regarding which version of Inkscape will feature it.
Any further questions? Some more tutorials on particular Inkscape features in demand? Just leave a comment.
Patreon subscribers get early access to my posts. If you are feeling generous, you can also make a one-time donation on BuyMeACoffee.
